
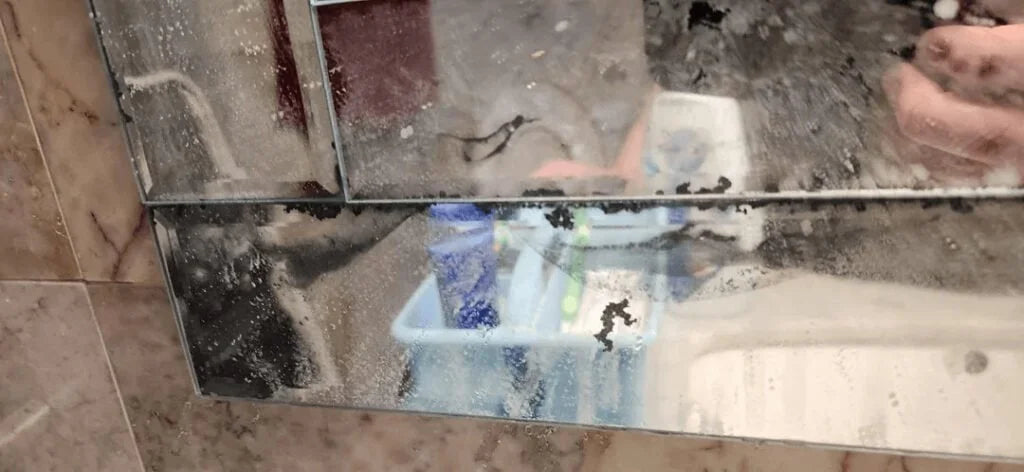
Over time, mirrors can lose their shine and develop discolouration, especially in damp areas. This is known as desilvering, where the reflective coating starts to break down.
But don't worry! You can repair it. In this guide, we’ll explore what causes desilvering, how to fix it, and tips to keep your mirrors looking great for longer.
How to repair mirror desilvering?
To repair mirror desilvering, use a mirror repair kit. Clean the area, apply the silvering solution, and let it dry. For larger damage, it’s best to replace the mirror entirely.
Key Takeaways
- Desilvering happens when the reflective coating on a mirror deteriorates, often due to moisture or age.
- Repairing mirror desilvering can be done at home with the right materials, but it’s a delicate process.
- Regular cleaning and proper maintenance can help prevent desilvering in the future.
What is Mirror Desilvering?

Mirror desilvering refers to the peeling or discolouration of the reflective silver coating on the back of a mirror.
Over time, exposure to humidity, cleaning products, or even general wear can cause the reflective layer to deteriorate.
Desilvering is most commonly seen around the edges of the mirror, where moisture tends to collect. However, it can also appear as cloudy dark spots or fading areas across the surface.
Causes of Mirror Desilvering
1. Moisture Exposure
Mirrors in bathrooms or kitchens are particularly prone to desilvering due to the high moisture levels. Over time, condensation can weaken the silver backing.
2. Improper Cleaning
Harsh chemicals or abrasive cleaners can damage the reflective layer. Using paper towels or rough sponges can also scratch the surface, leading to desilvering.
3. Aging
Older mirrors with original coatings are more likely to develop desilvering as the materials break down over time.
Step-by-Step Guide to Repair Mirror Desilvering
If your mirror is showing signs of desilvering, you don’t need to replace it just yet. Here’s how you can restore it with a few simple steps.
Step 1: Gather Your Materials
Before starting the repair process, make sure you have the following materials on hand:
Silvering solution: This is a special solution used to restore the reflective coating on mirrors. It can be purchased from online retailers or home improvement stores.
Glass cleaner: A gentle cleaner for cleaning the mirror’s surface before starting repairs.
Soft cloth or sponge: For cleaning and wiping down the mirror.
Tape: Masking tape or painter’s tape will help protect areas you don't want to apply the silvering solution to.
Rubber gloves: To protect your hands from chemicals.
Old newspapers or drop cloth: To protect your working surface and catch any spills.
Step 2: Clean the Mirror Thoroughly
Begin by cleaning the surface of the mirror to remove dirt, dust, and grime. Use a glass cleaner and a soft cloth to wipe down the entire surface.
Be careful not to get any cleaner on the edges where the desilvering is happening, as it could make the damage worse.
Tip: Use a non-abrasive cleaner to avoid scratching the mirror further. Avoid harsh chemicals, especially those containing ammonia, as they can damage the reflective coating.
Step 3: Mask the Area Around the Desilvering
Once the mirror is clean and dry, use masking tape or painter’s tape to cover the areas of the mirror that you do not want to apply the silvering solution to.
This is especially important if you are only repairing a small section of the mirror or the edges.
Step 4: Apply the Silvering Solution
Now comes the delicate part—applying the silvering solution. Carefully follow the instructions on the product, as silvering solutions can vary in application methods.
How to apply: Using a small brush or sponge, gently apply the silvering solution to the areas where the reflective coating has peeled off or faded.
Apply a thin, even layer. Avoid using too much solution to prevent drips or uneven coverage.
Step 5: Let the Solution Set
Allow the silvering solution to dry according to the manufacturer’s instructions. This usually takes around 20 to 30 minutes. Make sure the area is left undisturbed during this time.
Tip: If necessary, apply a second coat of the silvering solution for a more even finish, but ensure the first layer is completely dry before doing so.
Step 6: Protect the Coating
Once the solution is dry, you can apply a protective coating over the new silvering to ensure that it lasts.
This is especially important in areas with high moisture levels.
You can either purchase a clear protective coating specifically for mirrors or use a clear acrylic spray designed for use on metal surfaces.
How to apply: Apply the protective coating in light, even layers and allow it to dry completely before removing the tape.
Step 7: Clean the Mirror
Once the repair is complete, give the mirror another light cleaning to remove any excess solution or protective coating. Make sure to clean the mirror’s surface with a soft, lint-free cloth.
How to Prevent Future Mirror Desilvering

Now that your mirror is restored, it’s important to take steps to prevent future desilvering. Here are a few tips to keep your mirror looking its best:
1. Keep the Mirror Dry
Moisture is the leading cause of desilvering, so be mindful of where you place your mirrors. In bathrooms, use an exhaust fan to reduce humidity levels, especially after showers.
2. Avoid Harsh Cleaning Products
Use gentle, non-abrasive cleaners when wiping down your mirror. Avoid using ammonia-based or acidic products that can break down the silver backing.
3. Install a Bathroom Ventilation System
If your mirror is in a bathroom, installing a good ventilation system can help reduce moisture levels and prevent condensation from damaging the mirror.
4. Regular Maintenance
Periodically check your mirrors for signs of wear or desilvering. Early intervention can prevent minor issues from becoming major problems.
Frequently Asked Questions
1. Can I fix desilvering on any type of mirror?
Yes, you can repair most types of mirrors, including bathroom, wall, and vanity mirrors. The process may vary slightly depending on the material of the mirror and the extent of the desilvering.
2. How long will the silvering repair last?
With proper care and maintenance, a repaired mirror can last for many years. However, exposure to moisture or harsh cleaning can wear the coating over time, requiring touch-ups.
3. Is it safe to repair desilvering on my own?
Yes, with the right tools and materials, repairing desilvering on a mirror can be a safe DIY project. Just be sure to follow instructions carefully and wear protective gloves when working with chemicals.
Conclusion
Repairing desilvered mirror may seem like a challenging task, but with the right approach, it can be done easily at home.
Whether you’re dealing with small black spots on your bathroom mirror or larger areas of wear, following the steps outlined above can restore the reflective surface to its former glory.
By maintaining your mirror properly and taking preventive measures, you can extend its lifespan and keep your home looking fresh and well-kept.